How to deploy a Nestjs/Postgres server to Heroku


I had some trouble deploying my NestJS/Postgres server to Heroku. To save anyone else (and possibly my future self) the headache, here are the steps. Repo here for reference/cloning.
Prerequisites
- Heroku account
- Heroku cli installed
- Repo running locally. (You can clone my example repo here)
- Local repo linked to local postgres db (not essential for the deploy but def recommended)
Steps
1. Create your app in heroku
In your app’s root directory create the heroku app with:
heroku create <app-name>
Your app should now exist in heroku. Login to check.
2. Deploy your app
Heroku has a couple deployment options. You’ll most likely want to use the connect to GitHub option. Your app will then redeploy with each push to main. In you heroku app dashboard click on the “Deploy” tab to view the options. Chose the deploy option that works best for you.
3. Configure the Procfile with the start command
The Procfile is used to specify a specific start command for your app (otherwise heroku uses the standard start command: npm run start).
Make sure the Procfile has the following start command:
web: node dist/api/main.js (if you cloned the repo — it's there).
If your app has a different production start command you should make sure it is added to the Procfile.
4. Create a postgres db in heroku
Use the command
heroku addons:create heroku-postgresql:hobby-dev
(command line in root) to create the db. This creates a postgres db instance in your heroku app. You’ll have to configure the app’s db credentials so the app can connect to the db. If you run heroku logs --tail in the command line you’ll see that the app fails when trying to connect to the db:

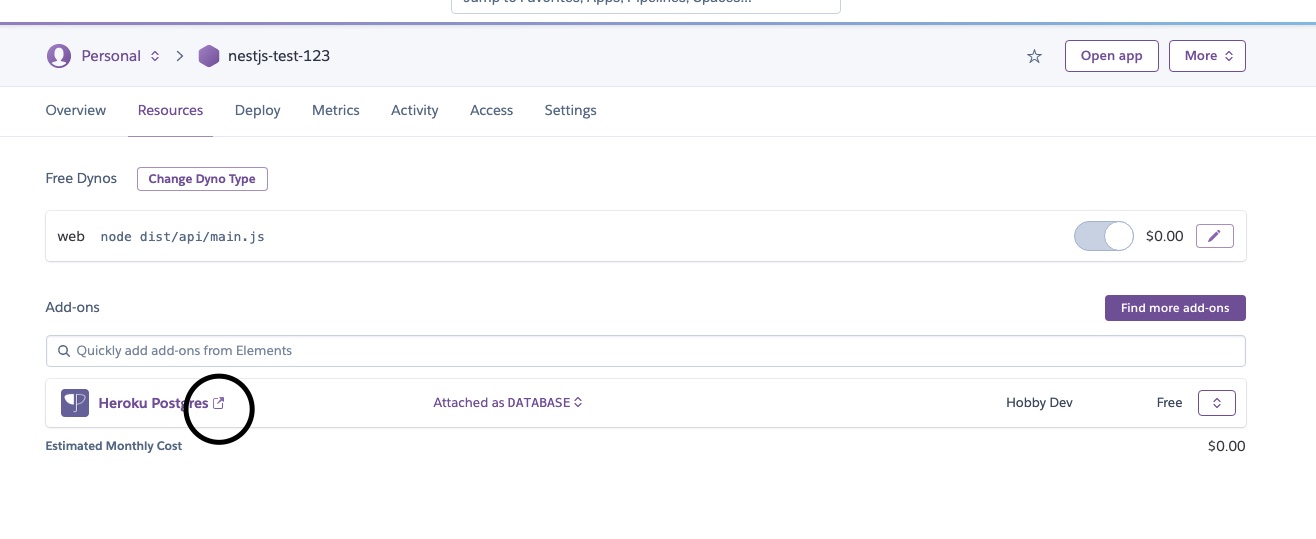
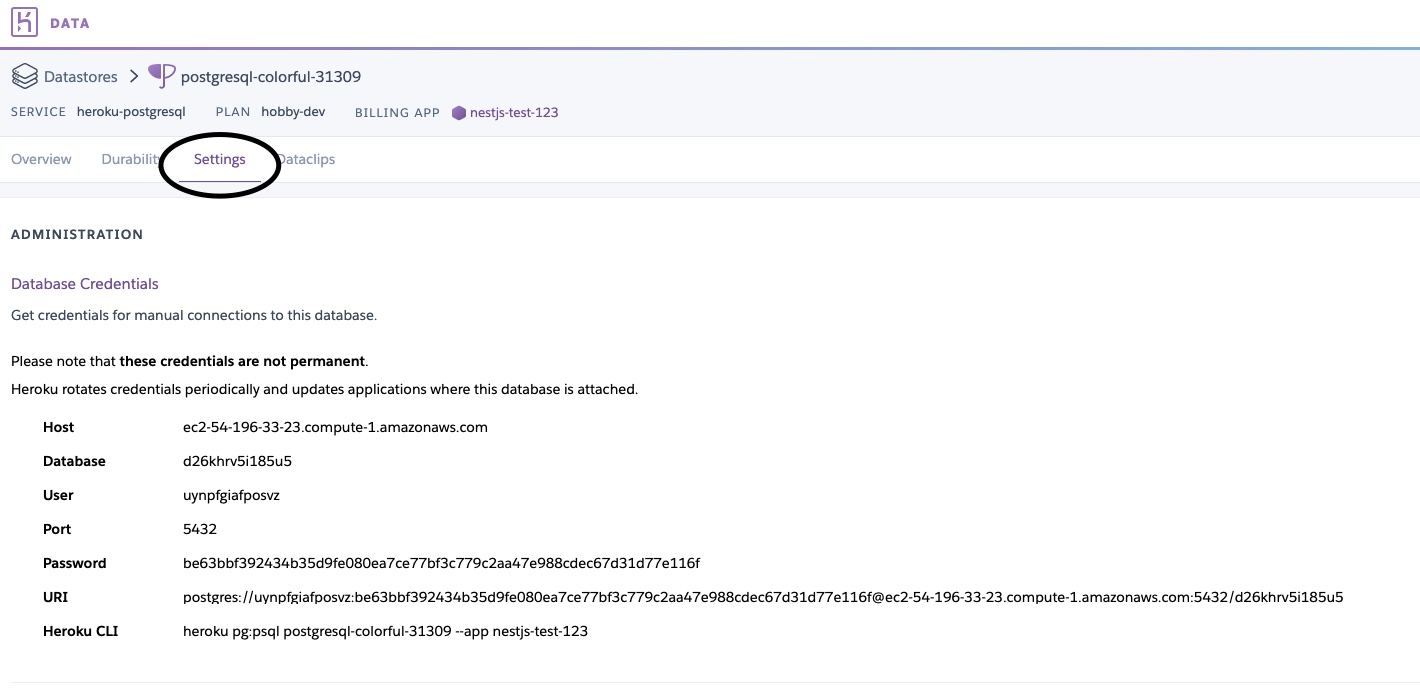
5. Find db credentials
To find the db credentials you can run
heroku pg:credentials:url
in the command line or click on the db instance link in heroku dashboard→ will open a db gui → settings → database credentials:
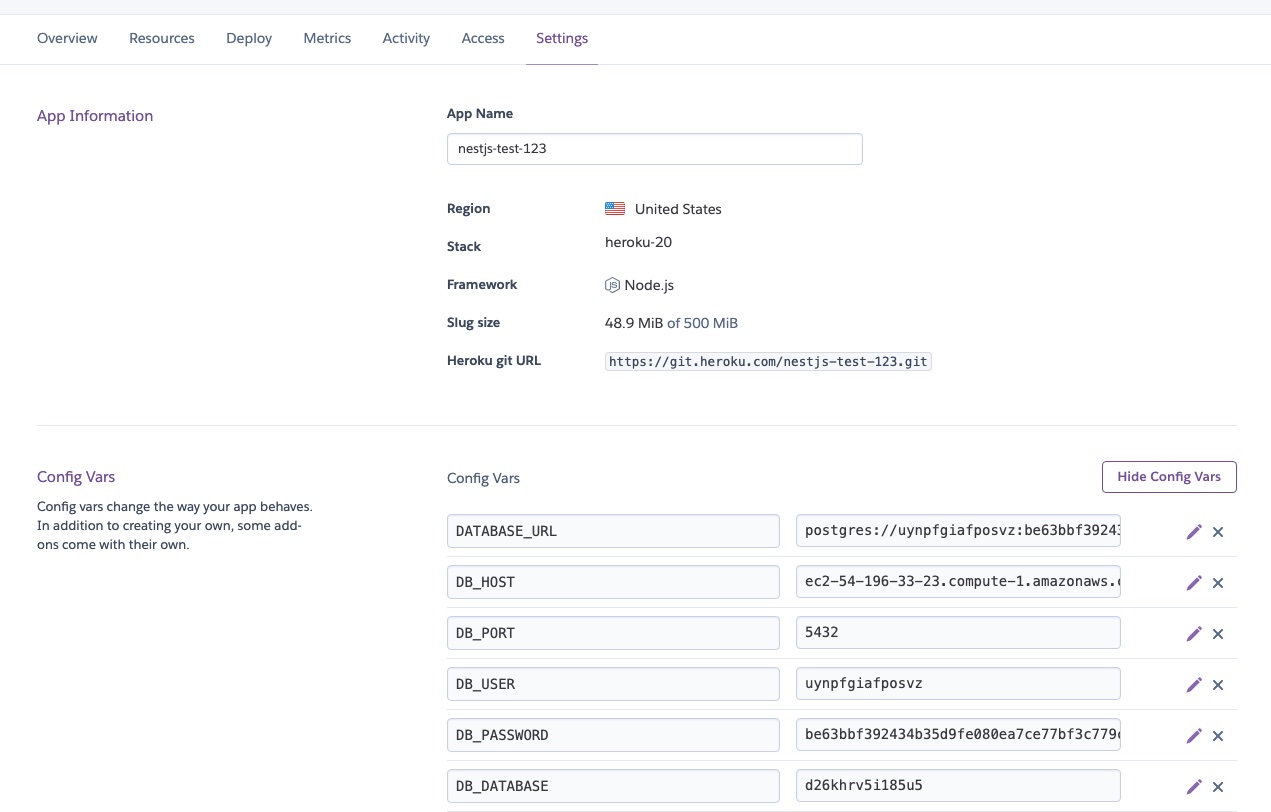
6. Copy the credentials into heroku config variables
Heroku automatically creates a DATABASE_URL variable that includes all the db credentials. I suppose you could import just the DATABASE_URL variable into app.module.ts and parse it into the individual credentials. However, I found it easier to just add the variables to heroku’s settings → “Config Vars:”
Now, when you run
heroku logs --tail
you’ll see the app connects to the db and starts successfully!
Overall, heroku makes deploying pretty intuitive. The two steps that tripped me up initially were setting the start command in the Procfile and adding the db credentials to the config vars.
Hopefully this will help others get their app up and running quickly!